

Brow Lamination – Your Complete Step-by-Step Guide
5th May 2025
Looking for perfectly shaped, full, and well-groomed brows without daily styling? Brow lamination is your new best friend! This popular beauty treatment delivers immediate results that can last up to six weeks. In this guide, you'll learn everything you need to know to perform the procedure safely, effectively, and professionally.
What you’ll learn in this guide:
✔️ What brow lamination is and the results it offers
✔️ Which products and tools you need for a professional treatment
✔️ Step-by-step instructions from prep to aftercare
✔️ Why timing is everything in lamination
✔️ How to nourish brows and extend the results
Ready to dive in? Let’s go!
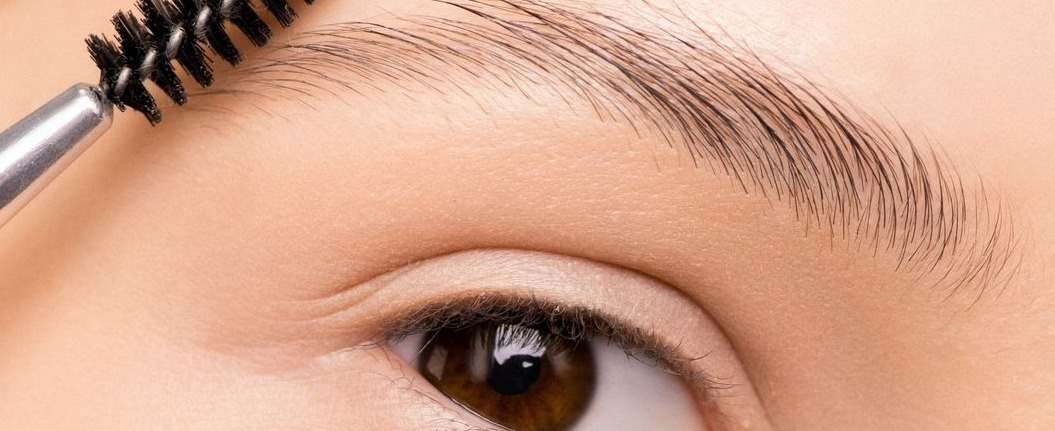
What is Brow Lamination?
Brow lamination is a cosmetic treatment that tames unruly brow hairs, enhances their natural shape, and creates a fuller, more defined look. After the treatment, brows become softer, more flexible, and easier to style — no brow gel needed!
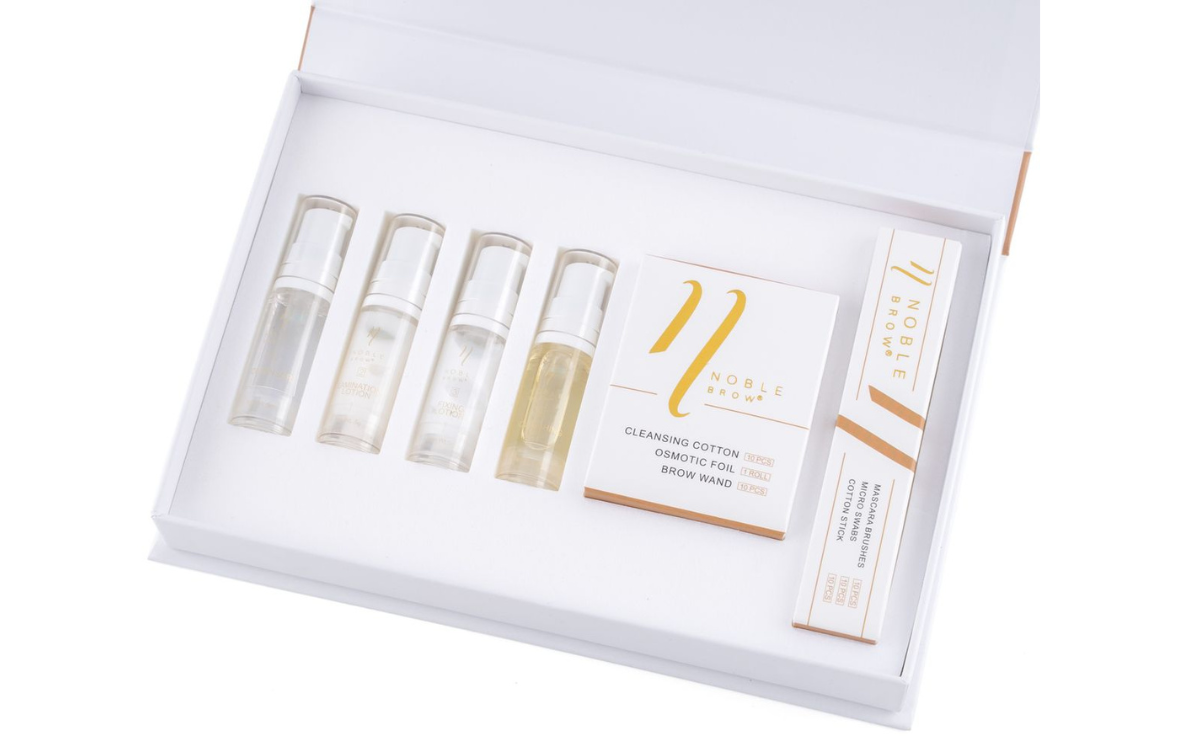
What should a professional brow lamination kit include?
To perform a professional brow lamination, you’ll need a few key products:
-
Cleaner – to thoroughly clean the brow area before treatment
-
Lamination lotion – softens hair structure to make hairs pliable
-
Fixing lotion – sets the new shape in place
-
Nourishing serum – hydrates and strengthens brow hairs
-
Osmotic foil – boosts the effectiveness of the lotions
-
Tools – spoolies, microbrushes, velour tips, and applicators
Some kits may also include cotton pads and mini brushes for precision styling and grooming.
Brow Lamination Step-by-Step
1. Cleansing and preparation
Start by cleansing the brows thoroughly using a professional cleaner. This removes makeup, oil, and impurities, ensuring the products penetrate evenly. Use a cotton pad to gently wipe the area.
2. Applying the lamination lotion
Next, apply the lamination lotion. This formula breaks down the hair structure so you can brush the brows upward and sculpt them into the desired shape.
3. Foil application – a game changer
Cover the brows with osmotic foil. This helps lock in heat and moisture, speeding up the process and boosting product effectiveness — especially for thicker, coarser brows.
4. Timing is everything
Stick to the recommended time (usually 5–8 minutes) for each product. Leaving lotions on too long can damage brow hairs, while removing them too soon can lead to poor results. Always tailor the timing to the client’s hair type.
5. Fixing the shape
After removing the first lotion, apply the fixing lotion. Brush the hairs again to lock them into place and maintain the desired shape. Keep an eye on the time — just like before.
6. Clean and nourish
Once the fixing lotion is removed, cleanse the brows again. Then, apply a nourishing oil or serum to restore shine, strength, and moisture.
Why brow nourishment matters
Lamination chemically alters the hair structure, so proper aftercare is essential. Nourishing products rich in keratin, argan oil, or silk proteins help repair and protect the brows, keeping them soft, healthy, and flexible. This step not only enhances the look but also extends the longevity of the results.
How long do brow lamination results last?
Results are visible immediately and typically last 4–6 weeks. Brows remain disciplined, easier to manage, and naturally lifted — with minimal effort required.
Is brow lamination worth it?
Absolutely — especially if:
✨ You want to wake up with picture-perfect brows
✨ You’re tired of daily styling and brow gels
✨ You’re after a natural yet bold effect
With the right products and proper application, brow lamination is a safe, quick, and effective way to elevate your look and simplify your routine.