

How to Perform the Perfect Brow Henna Treatment
30th Apr 2025
Dreaming of flawless brows without daily makeup? Learn what henna is and how to create salon-quality brows step by step — like a true pro!
In this post, you'll discover:
What exactly is henna and how is it used?
Why henna is great for brow styling
Which henna to choose – gel or powder?
A step-by-step guide to brow henna application
How to achieve a stunning, Instagram-worthy brow look
Ready? Let’s go — become a brow henna queen!
What is Henna?
Henna is a natural dye made from the leaves of the Lawsonia inermis plant. When mixed with water, it forms a paste that stains both hair and skin — creating beautifully defined and fuller brows.
Henna is commonly used for:
✅ Coloring brows and lashes — shapes and fills in sparse areas
✅ Hair dye — enhances color and strengthens strands
✅ Body art — temporary tattoos and skin decoration
Why Choose Henna?
✔ Natural – a gentle alternative to chemical dyes
✔ Long-lasting – effects can last up to 6 weeks
✔ Professional – stunning results with zero makeup
✔ Nourishing – strengthens and cares for brows and lashes
TIP: Recommend castor oil for your clients — when used regularly, it supports hair growth and prolongs the results of the treatment.
Which Henna is Best?
Professional brow stylists typically choose one of two types:
Powder Henna – like permanent makeup (but needle-free)
Powder activated with a special liquid
Colors both skin and hair – creates a sharp, defined shape
You can mix shades (try the Noble Brow collection)
Lasts: up to 12 days on skin, 6 weeks on hair
Gel Henna – for a soft, natural look
Gentle formula — perfect for sensitive skin
Mainly tints the hairs for a subtle enhancement
Recommended: RefectoCil – mild but effective
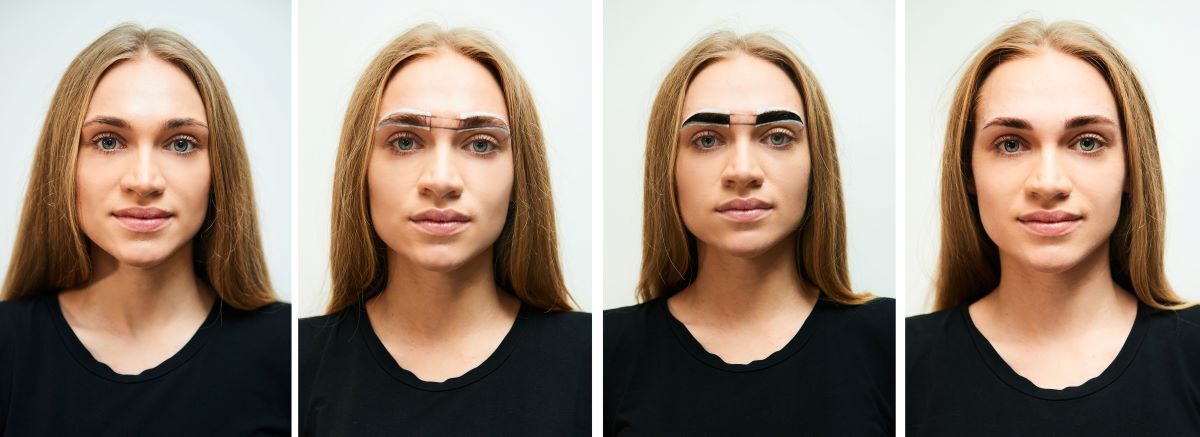
Step-by-Step: Perfect Brow Henna Application
Step 1: Consultation + Allergy Test
-
Discuss your client's preferences
-
Choose the ideal color and brow shape
-
Perform an allergy patch test 48h before the treatment
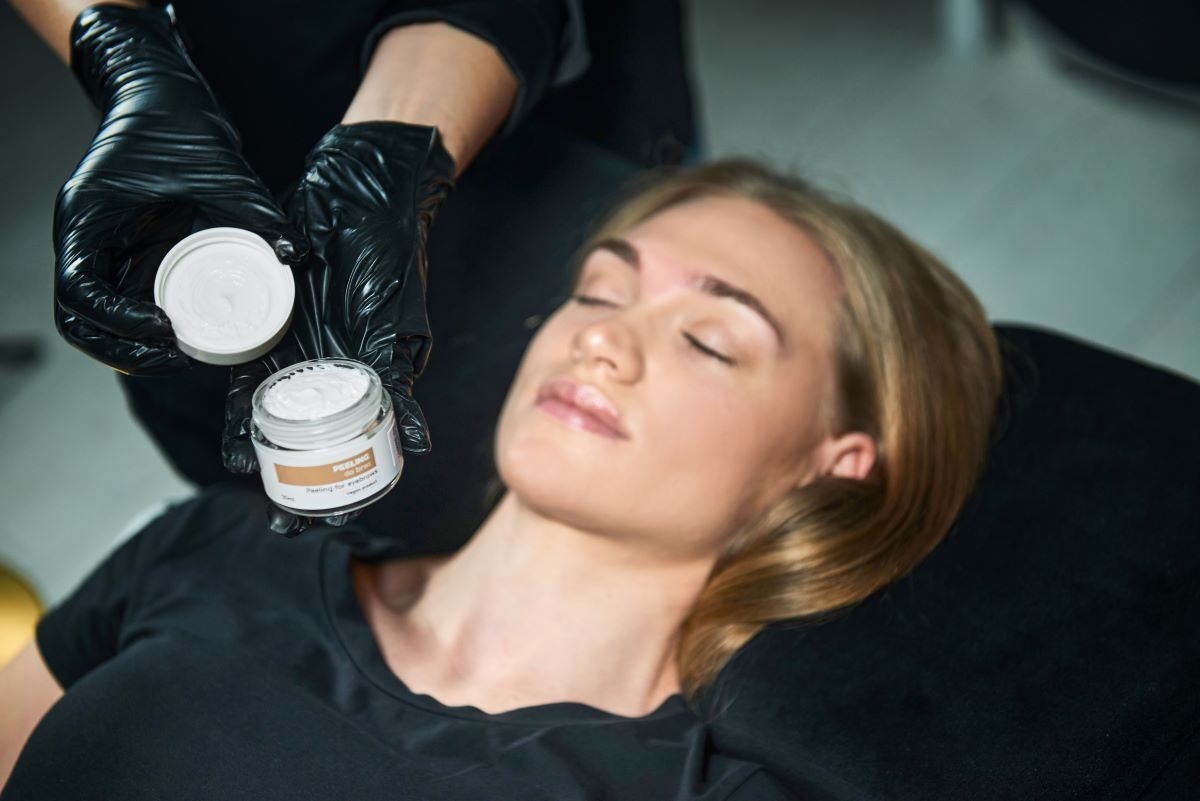
Step 2: Prep the Brows
-
Cleanse the skin — remove sebum and dead skin cells
-
Use Noble Brow Scrub and Lash & Brow Shampoo
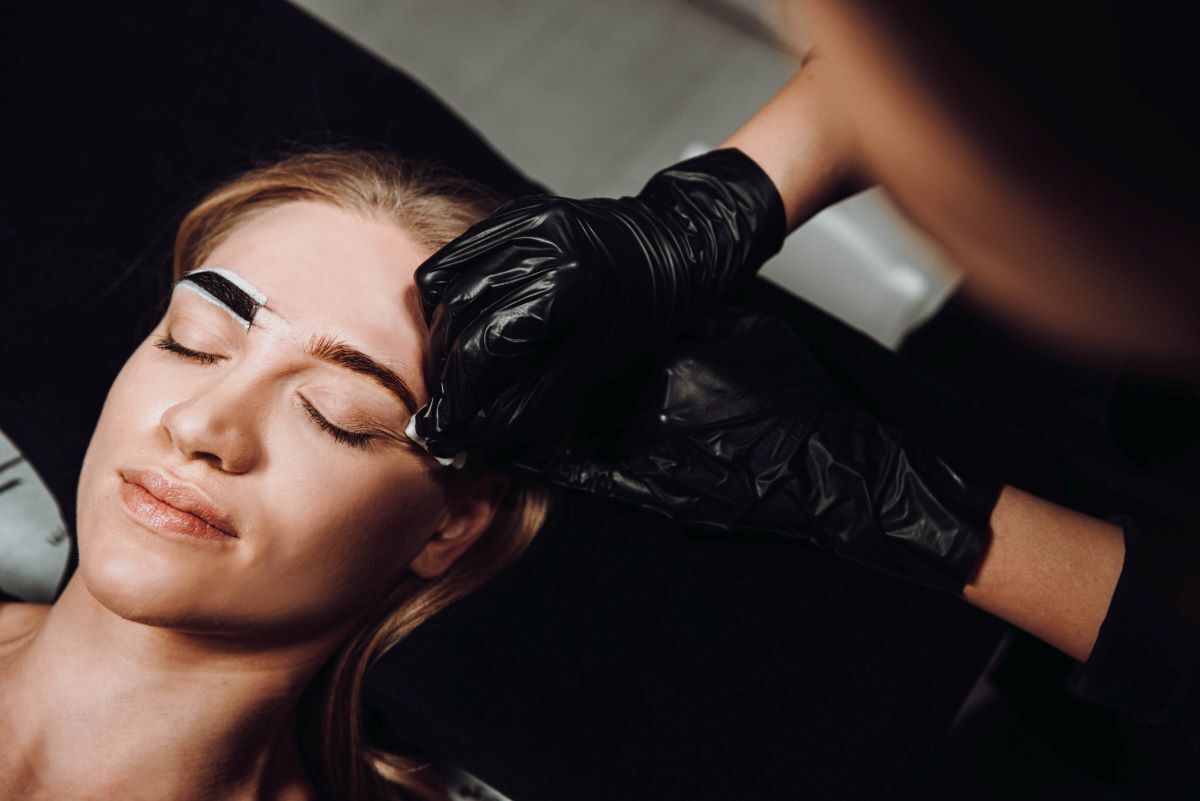
Step 3: Shape the Brows
-
Outline the brow shape with white paste
-
Protect surrounding skin from staining
Step 4: Mix the Henna
-
Combine henna and activator in a 5:1 ratio
-
Prepare your brush, cotton pads, concealer, and castor oil
Step 5: Apply the Henna
-
Apply in thin layers, starting from the tail of the brow
-
Remove once the paste has dried
TIP: For an ombre effect, wipe the inner part of the brow a few minutes earlier
Step 6: Final Touches
-
Clean up with concealer
-
Pluck stray hairs with tweezers
Done! Let your client admire their new look in the mirror
Want to Master Brow Styling Like a Pro?
Sign up for our brow styling course and get certified!
[Join now]